Holiday Gift Tags

My students will be debuting holiday gift tags this year at our annual December market. They work throughout the Fall choosing a business name, designing a logo, and staying after school at workshops to produce a handful of holiday gift items. We have some favorite items like SIMMERING SPICES and LAYERED COOKIE MIXES that our repeat customers expect, but we also try to mix in new products each year too. This year, the new product is handmade paper gift tags.

DIY holiday gift tags

To make the holiday gift tags, we used white paper marking tags with a reinforced hole. I was able to buy a box of 500 at Staples. However, there are many options for gift tags. I found packs of twelve at Michael’s Crafts in different paper options, and I know there are large and small sizes. Once you have the tags, you can add a variety of embellishments. We used fine black pens and rulers, rubber stamps, buttons, washi tape, fancy hole punches, and a little creativity.

DIY holiday gift tags

Holiday Gift Tag Materials

  • 4 3/4″ x 2 3/8″ white marking tags with reinforced holes (any paper gift tag would work– you could even cut your own)
  • fine tip black pen
  • ruler
  • Elmer’s glue
  • buttons
  • washi tape or ribbon
  • rubber stamps
  • ink pads
  • fun shaped hole punches
  • any other embellishments– sequins, mini flowers, round gems…

DIY holiday gift tags


Holiday Gift Tag Ideas

  • Ornaments– With the ruler and black pen, make 3 parallel lines. Near the end of the drawn line, draw a bow by making a flower petal shape on each side of the lines. At the end of each black line, glue a button. Stamp a holiday message if you would like.
  • Snowman– Draw a short, wavy line near the bottom edge of the gift tag. Place two buttons, one on top of the other, on the wavy line to act as place holders. Draw two stick arms and a simple top hat (rectangle with line). Glue the buttons to the card in the appropriate spots to fit the arms and hat. Stamp a holiday message in the white space if you would like.
  • Decorative Strips– Using washi tape or ribbon and glue, place 2-3 strips along an edge of the tag. Stamp a holiday message or glue additional sequins, buttons, or small flowers in a decorative way.
  • Punched Shapes– Punch out fun shapes and glue small shapes to the gift tag. Another option is to make a band of washi tape and hole punch shapes in the washi taped section of the card. Remove the shapes from the puncher and glue them randomly around the card. Stamp a holiday message to finish.

DIY holiday gift tags

We are putting an assortment of 5 gift tags in bags to sell at our holiday market. They make a sweet little gift for a neighbor or co-worker or even a hostess gift at Christmas. They are also fun to attach to your own presents that you will be wrapping this holiday season!

DIY holiday gift tags

Holiday Simmering Spices

Holiday Simmering Spices are the perfect low prep gift to give friends this Christmas season. I used to throw an annual cookie exchange and would put together a little party favor for the guests. One year I gave each friend a bag containing the “Essence of Christmas”. This is something my mom always had simmering on the stovetop at our house during the holiday season; it makes your whole house smell like Christmas.

simmering spices

It is easy to make in big batches, and if you are already in cocoa kit or rosemary nut production, you should have a large supply of clear bags and labels– perfect for packaging these goodies. Share with neighbors, teachers, co-workers, or bring as a hostess gift to parties.

Simmering Spice Ingredients

  • 1 t. cloves
  • 4-5 juniper berries (can be hard to find, Whole Foods usually has these with the bulk spices from Thanksgiving to Christmas)
  • 1 whole orange (OPTIONAL, navel oranges– cannot use clementines or tangerines)
  • 3-4 bay leaves
  • 2-3 cinnamon sticks

simmering spices

Label Directions

  • Slice orange and add slices with spices to a pot with 4-5 cups of water. Simmer on the stove to emit a wonderful Christmas fragrance. Refill water as necessary.

Simmering Spice Notes

  • You can make bags with our without the orange. The bags last almost forever if you do not include the fresh orange.
  • CLICK HERE to download a sheet of printable labels. Print on cardstock and cut apart to make nice tags to attach to the simmering spice bags.

simmering spices

Homemade Dog Treats

dog-biscuits-christmas-treat

This year, Miss Priss and Mr. Star Wars have several teachers who are dog owners. It gave me a little inspiration for a new teacher gift idea for the holidays. We got out a dog biscuit cookbook and tried out a few organic dog food recipes. Most of the dog treats need to be refrigerated after baking, so we narrowed down our choices to two recipes that can be stored at room temperature when finished. (CLICK HERE to see the Bubba Rose Biscuit Company cookbook information.)

dog-biscuit-dough

We liked the recipes that made a dough that rolled out, so you could cut fun shaped dog treats. We used bone, fire hydrant, and squirrel cookie cutters. The dough is a little sticky at first, and we kneaded in a little extra flour to make it easier to work. We tried to roll the dough about 1/4″ thick, but if you have kids rolling out the dough, you might have some batches that are thicker. Increase the baking time if you have thicker biscuits. We watched until the biscuits were browned on the edges.

dog-biscuit-cookie-cutters

There are many dog treat recipes available online. You need to know if your dog has any food sensitivities, and the dog biscuits should never have chocolate, raisins, onions, and a few other items that are toxic to dogs. Many of the recipes I found had specialty flours (we used brown rice flour and oat flour), so check your pantry before starting. CLICK HERE for one recipe from the Bubba Rose people that is similar to the ones we made. Our cookbook said it is easy to swap out the “flavor” ingredients for something similar– it did not recommend replacing the flours. For example, if a recipe calls for cheddar cheese, you could replace with provolone. If a recipe calls for ground chicken, you could replace with ground turkey.

When we are putting together our gift boxes, we are making sure there is a mix of shapes in the gift box (or bag). We are also wrapping up a few gift boxes for our neighbors and friends who have family dogs.

dog-biscuits-in-a-bowl

Jelly Bean Valentines

jelly bean envelopes

Yes, we start planning class Valentines early at our house. I am sure that is no surprise to the readers who have been with me for awhile. I always need a Valentine of some kind for my students, and Miss Priss and Mr. Star Wars are still at ages where they bring in Valentines to distribute to their whole class. While it would be the most efficient to think of one type of card and mass produce it, the three of us usually make different kinds of Valentines for each of our classes.

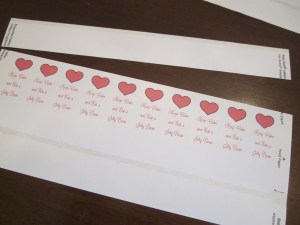
This year, Miss Priss is filling small colored paper sacks with assorted jelly beans. We closed the little bags with a label that says, “Keep Calm and Eat a Jelly Bean.” To finish, Miss Priss signed her name at the bottom of each label.

jelly bean envelopes materials

Materials

  • Celebrate It Mini Paper Sacks, 2 1/2″ x 4″ (coin envelopes or other mini bag would work too)
  • assorted jelly beans in Valentine colors (we picked our own at the fill-a-bag Jelly Belly station at the grocery store)
  • Avery 8161 labels (1″ x 4″)

Directions

jelly bean envelopes labels

  • Fill each sack with ~one tablespoon of jelly beans (don’t overfill the little bags).
  • Fold over the top flap and close with the sticker label.

jelly bean envelopes with label

Notes

jelly bean envelopes pile

Mason Jar Cocoa Mixes

layered cocoa mix

For the past two years, my students have operated a small business at the holidays selling Mason Jar Cookie Mixes to the families in our school community. It is part of our focus on business and financial literacy skills that we cover all year. This year, we changed it up a little and manufactured layered cocoa mixes. The new business had a lower overhead, and it was easier to source pint sized Mason jars, which translated into (a little) less work for the teacher-supervisors!

Mason jar cocoa mix front view

The cocoa mixes make great gifts for friends and neighbors at the holidays and are easy to assemble. Whether you are making 27-dozen like we did or just a few for gifts, it is an easy DIY holiday gift.

IMG_1123

Ingredients

  • 1/2 c. powdered milk
  • 1 T. original powdered creamer
  • 1/2 c. unsweetened cocoa powder
  • 1/2 c. granulated sugar
  • 1/8 t. salt
  • 1/4 c. semi sweet mini chocolate chips
  • 1/4 c. crushed peppermint bits
  • 1/4 c. mini marshmallows (or enough to fill to the top of the jar)

Directions

  • In a pint Mason jar, layer ingredients in the order listed above beginning with the powdered milk.
  • Press firmly after the chocolate chip layer and again after the peppermint bits layer.
  • Fill to the top of the jar with marshmallows.

Serving Instructions

  • Attach a tag with a ribbon that says, “Mix jar ingredients in a large bowl. For each serving, place 1/3 c. mix in a mug and stir in 1 c. boiling water. Store remaining mix in an airtight container.”

cocoa mix serving

Notes

  • I found 5 oz. bags of crushed peppermint at Walmart in their holiday baking display. If you can’t find pre-crushed peppermint, buy classic candy canes and crush them yourself. If you are making really large quantities, order online from a source like Candy Warehouse in 5-lb. bags.

complete